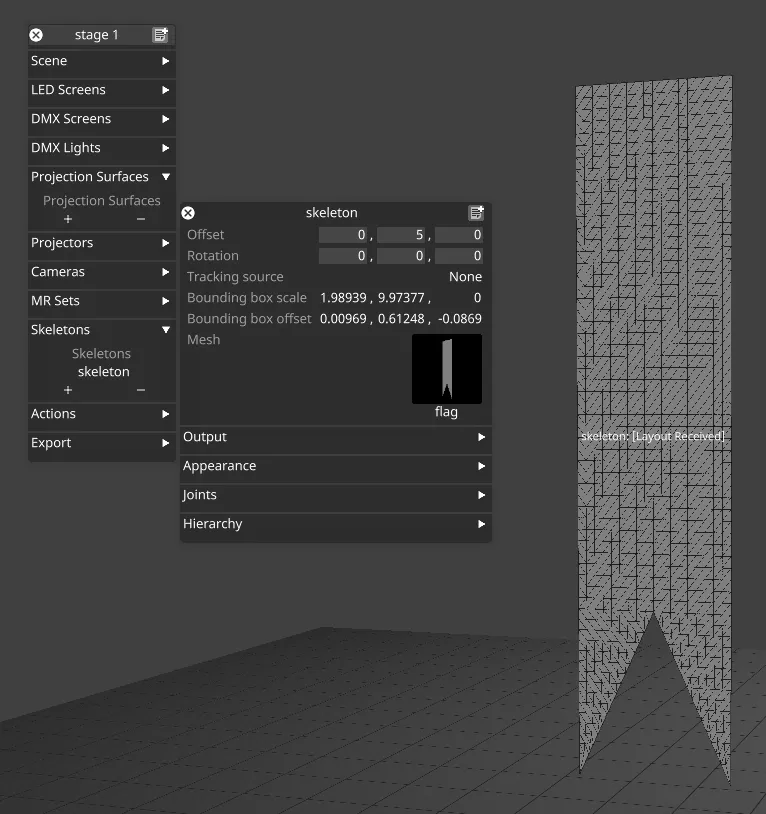
スケルトン
Skeleton オブジェクトは、Disguise におけるモーションキャプチャおよびスキンドメッシュワークフローの起点です。スケルトンは、ボーンのリグ構造で構成され、トラッキングソースから提供されるか、リグ済みの FBX メッシュからインポートされます。これらのボーンを動かして Disguise 内でスキンドメッシュを変形させたり、RenderStream を介して送信して外部のレンダーエンジン内のスケルトンを制御したりできます。
新しいスケルトンの作成と編集
Section titled “新しいスケルトンの作成と編集”-
ステージエディターの Skeletons で + ボタンをクリックすると、デフォルトのボーン構造を持つ新しいスケルトンが追加されます。
-
Mesh フィールドを使用して、スケルトン用のリグ済み FBX メッシュを選択します。
-
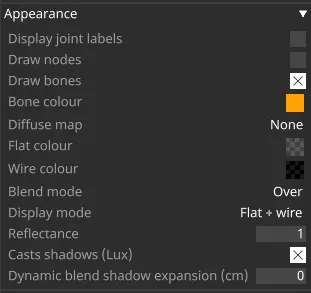
Appearance(外観)セパレーターでは、ボーンやメッシュの表示・非表示など、ビジュアライザー内でのスケルトンのレンダリングを制御するオプションを設定できます。
-
Joints(ジョイント)セパレーターでは、ボーンのオフセットと回転を調整して、スケルトンを手動でポーズ付けできます。

-
スケルトンのポーズをゼロにリセットするには、Joints セパレーターの Zero Pose ボタンをクリックします。
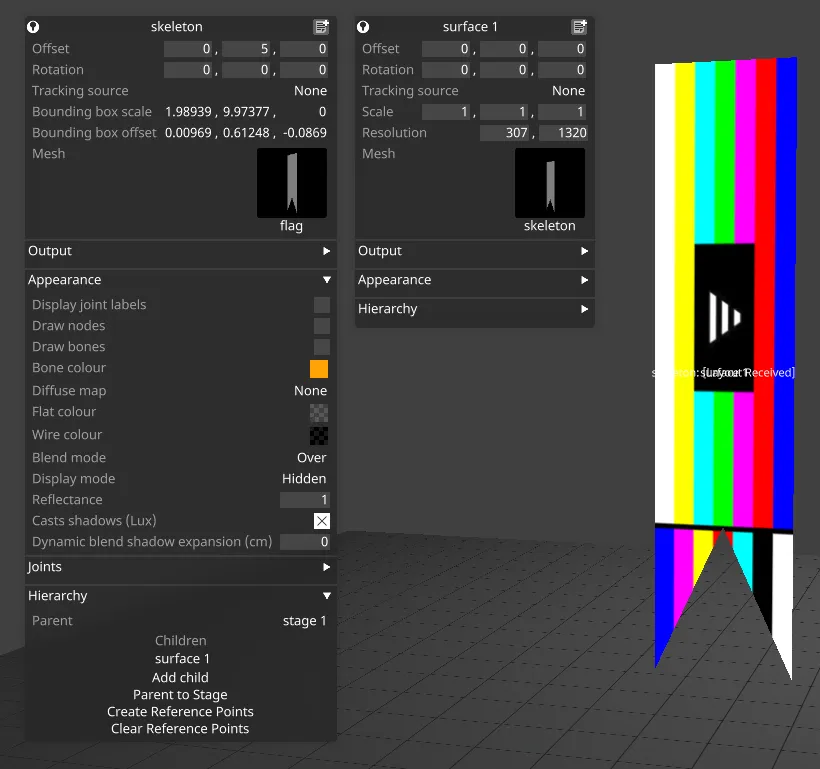
プロジェクションサーフェス用のスキンドメッシュのセットアップ
Section titled “プロジェクションサーフェス用のスキンドメッシュのセットアップ”- 単一のリグ済みメッシュを含む FBX ファイルを見つけるか作成し、これをプロジェクトの objects/Mesh フォルダーにコピーします。
- 新しいスケルトンを作成し、スケルトンの mesh フィールドで FBX メッシュを選択します。
- 新しいプロジェクションサーフェスを作成し、(元の FBX メッシュではなく)スケルトンにちなんで名付けられたメッシュを選択します。
- スケルトンエディターの手動ポーズコントロールを使用して、スケルトンのボーンを動かしてみます。メッシュは、スケルトンとプロジェクションサーフェスの両方で変形するはずです。
- プロジェクションサーフェスをスケルトンと正確に位置合わせするには、プロジェクションサーフェスをスケルトンの子として追加し、サーフェスのオフセットと回転をゼロに設定します。
- スケルトンのメッシュを非表示にしたい場合は、Appearance の Display mode を Hidden に設定します。
アニメーション化されたスケルトンの再生
Section titled “アニメーション化されたスケルトンの再生”スケルトンのアニメーションは、scene animation layer を使用してタイムライン上で再生できます。これを行うには、アニメーション化された FBX スケルトンをロードし、通常どおりメッシュとして選択します。次に、scene animation layer の手順に従ってアニメーションを再生します。
トラッキングデータを使用したスケルトンの制御
Section titled “トラッキングデータを使用したスケルトンの制御”トラッキングデータを使用してスケルトンのボーンを制御するには、スケルタルトラッキングソースまたはドライバーを作成する必要があります。利用可能なトラッキングソースには以下があります。
あるいは、個々のジョイントの位置と回転を、トラッキング axes を使用して制御することもできます。トラッキング軸でスケルトンのジョイントを制御するには:
- Devices で新しい Position Receiver を作成します。
- Position Receiver エディターを開き、Drivers の下で受信するトラッキングデータに適したドライバーを追加します。
- Axes セパレーターで Create Axes をクリックします。
- スケルトンのジョイントの制御に使用したい軸のエディターを開きます。
- Configuration セパレーターで、Object フィールドにスケルトンを選択します。
- Property フィールドに、制御したいジョイントのプロパティを表す式を入力します。例:
joints[10].pose.offset.x。 - 式は以下のように構成されます。
- 角括弧内のインデックスはジョイントのインデックスです。これは、スケルトンエディターでジョイントのオフセットまたは回転のセパレーターを展開することで確認できます。
poseの後に、制御したいプロパティに応じてoffsetまたはrotationのいずれかを入力します。- 式の末尾に
x、y、またはzを入力して、制御する軸を定義します。
![]()